Projects
Robotic Car Design
-
Designed and fabricated a robotic car capable of traversing ramps and flat surfaces.
-
Programmed a Raspberry Pi and processed http requests using Flask.
-
Used HTML/CSS, JavaScript to create a webpage for users to control the car over the internet.
Challenges:
-
Maintaining a constant IP address of the Raspberry Pi.
-
Creating smooth, and easily controllable turning.
-
Providing sufficient torque to the car wheels without wall outlet access.
Lessons Learned:
-
Incorporated HTML/CSS and JavaScript.
-
Used voltage divider to provide necessary voltages to microcontrollers and motors.

BLACK+DECKER Drill Product Teardown/Redesign and CAD Modeling
-
Examined use cases, concept of operations, and workflow of the product.
-
Modeled relevant parts in SolidWorks to match drill
-
Redesigned drill for Cerebral Palsy client using risk matrices and weighted down selection.
Challenges:
-
Creating SolidWorks models of shapes with unique curvature and profiles.
-
Simplifying use requirements, without altering product feel or appearance.
Lessons Learned:
-
Worked with client in order to better understand design specifications.
-
Recreated product CAD model without engineering drawings/dimensions.

Stepper Motor Gear Train
-
Modeled a gear train to increase a stepper motor's output torque and decrease its output speed using OnShape.
-
Fabricated gear train and housing using 3D printers and laser cutting.
-
Programmed a Raspberry Pi to precisely control stepper motor.
Challenges:
-
Meshing gears together.
-
Accounting for tolerances in 3D printed parts.
Lessons Learned:
-
Focused on gear train math in order to keep pitch constant between gears (allowed for gear meshing).


4 Bar Linkage - "Auto-Pie"
-
Designed a 4 bar linkage system, linkage/stepper motor housing, and "pie-holder" using OnShape.
-
Fabricated components using 3D printers and laser cutting.
-
Programmed a Raspberry Pi to precisely control stepper motor.
Challenges:
-
Keeping 4 bar linkage weight low.
-
Providing enough torque to the linkage system.
-
Restricting motion of 4 bar linkage into 1 plane.
Lessons Learned:
-
Designed CAD models with intention of lowering part weight.
-
Laser cut bearings and spacers in order to keep linkage movement 2D.


Line Follower (Color Sensor)
-
Used a color sensor to autonomously navigate a maze by following a specific color path.
-
Programmed a Raspberry Pi using PID control to maintain correct path along colored paths.
-
Fabricated chassis and wheels using 3D printers and laser cutting.
Challenges:
-
Consistency of color sensor readings.
-
Providing sufficient light to color sensor.
-
Finding the correct balance of proportional, integral, and derivative control in the overall PID controller.
Lessons Learned:
-
Focused on PID control to precisely control motion of a robot.
-
Used color sensor Python libraries.
-
Introduced to i2c controls within microcontrollers.


Airtable Controlled Create 3 Maze Navigation
-
Programmed a Raspberry Pi to communicate with the Create 3 over ROS2.
-
Controlled a Create 3 robot’s movements by publishing and subscribing to the “/cmd_vel” topic in. combination with the geometry message type “Twist”.
-
Used Airtable to request values that were input to publisher nodes.
Challenges:
-
Reading API key values so that they can be published to a topic.
-
Publishing values correctly such that they can be read by the topic.
-
Limited access to information on ROS2 topics.
Lessons Learned:
-
Used ROS2 to publish and subscribe to pre-existing topics.
-
Requested API values from Airtable in Python.

Autonomous Image Recognition Maze Navigation
-
Programmed a Raspberry Pi to communicate with the Create 3 over ROS2.
-
Published to Create 3 ROS2 topics "cmd_vel" and "cmd_audio" to control movement and audio of the Create 3.
-
Trained a model using Google's Teachable Machine to recognize objects through a Raspberry Pi Camera.
Challenges:
-
Slow Raspberry Pi run time limited iteration capabilities.
-
Raspberry Pi Camera field of view is small, making it challenging to view objects.
-
Recognizing objects at a desired distance from the robot.
Lessons Learned:
-
Published to the "cmd_audio" ROS2 topic using the "AudioNoteVector" message.
-
Processed Raspberry Pi Camera images to an image recognition model.
-
Used model outputs to control publishing to ROS2 topics on the Create 3.


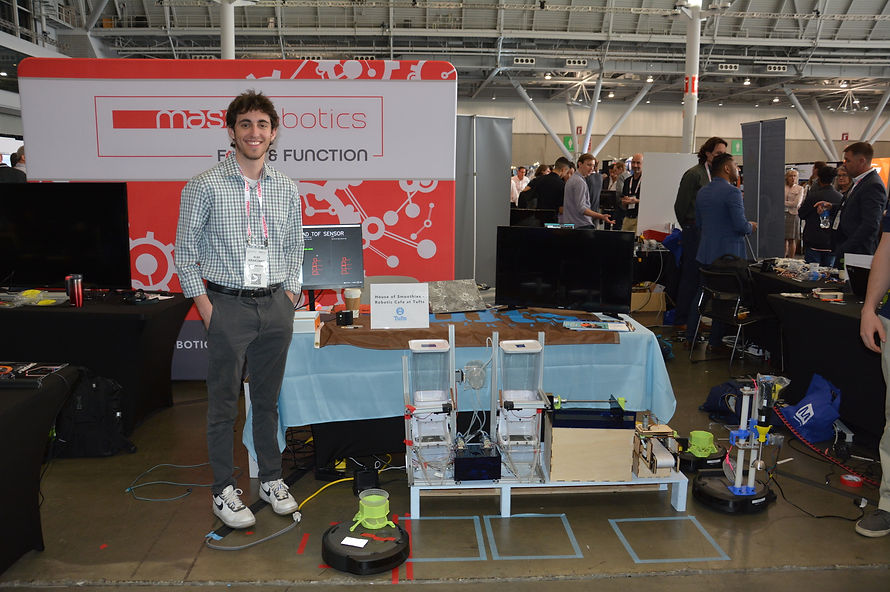
Autonomous Smoothie Cafe
-
Designed and fabricated components for "processing" and "blending" stations of cafe.
-
Managed interactions with sponsors to integrate components into the overall project.
-
Presented the smoothie cafe at the 2023 Robotics Summit & Expo.
Challenges:
-
Communication between project teams.
-
ROS2 compatibility with iRobot Create3 robots.
-
Managing budget.
-
Limited access to metal working machines.
Lessons Learned:
-
Planning project scope such that goals are achievable.
-
Communication between teams at all stages of a project is critical for success.
-
Ensuring that others can follow your design process and can operate your creation.


Carbon Fiber Composite Baseball Bat
-
Created a carbon fiber/epoxy layup to be wrapped around a 3D printed baseball bat mold, resulting in a carbon fiber composite baseball bat.
-
Compared swing tests with ANSYS force simulations.
Challenges:
-
Limiting creases in the carbon fibers during the vacuum bagging process.
-
Maintaining constant carbon fiber orientation within each layer.
-
Preventing weak points in the final laminate due to lack of epoxy or carbon fibers in certain areas.
-
Creating ANSYS simulations that represented the true loading conditions.
Lessons Learned:
-
Learned how to make complex geometries from composites.
-
Worked with ANSYS to replicate real life loading condition.


Corn Hole Made from Repurposed Bike Parts
-
Fabricated a corn hole set using bike parts and scrap steel.
-
Cut bike parts using the portable bandsaw.
-
Used TIG welding to make frame and legs of the corn hole set.
Challenges:
-
Finding bikes that were made from steel, not aluminum, so that they could be TIG welded.
-
Removing paint from bike parts to avoid toxic fumes during welding.
Lessons Learned:
-
Improved TIG welding skills.
-
Used new techniques to prepare bike parts such as the portable band saw and angle grinder.


Multi-Sample HTS Test Probe
-
Designed a multi-sample high temperature superconductor (HTS) test probe to make HTS tape characterization more efficient.
-
Created CAD models, CAD drawings, and bill of materials for several designs.
-
Collaborated with other engineers to meet design requirements surrounding cryogenic capacity, material selection, and energy loss minimization.
Challenges:
-
Material/product behavior at cryogenic temperatures
-
Optimization of ohmic losses and convective heat transfer across a temperature gradient.
-
Minimization and repeatability of contact resistances
-
Designing for manufacturability in a small, technologically limited machine shop.
-
Part lead time.
-
Limited prior knowledge about cryogenics and superconductivity.
Lessons Learned:
-
Designing for product robustness and reliability.
-
Deeper knowledge of material property dependence on temperature.
-
Fundamental understanding of cryogenic design and superconductivity.
-
Worked closely with machinists to make CAD drawings and bill of materials.


Automated Clothes Tagging System
-
Designed a system to improve upon the current manual tagging system for clothing identification in order to maximize efficiency and worker safety for immediate integration at Goodwill.
-
Created CAD models, CAD drawings, and a bill of materials for various prototypes.
-
Contributed to fabrication, mechanical analysis, and electrical/coding components of each prototype.
Challenges:
-
Geometric tolerancing on small, custom made parts.
-
Designing for reliability.
-
Preventing overheating of motors and drivers.
-
Handling of flexible materials (fasteners, tags).
Lessons Learned:
-
Collaboration with other engineers for a long term project.
-
Incorporating client requests into prototype design.
-
Limitations of 3D printing for part fabrication.
-
Managing budget.
-
Designing for ease of assembly, usability.


Current Distribution Modeling in Superconducting Transmission Lines
-
Created a foundational circuit model for current distribution within a high temperature superconductor (HTS) cable.
-
Conducted an independent literature review on HTS circuit modeling.
-
Worked with Tufts University professors and professional engineers to review circuit analyses.
Challenges:
-
Minimizing necessary calculations while providing accurate results.
-
Acquiring data for testing model validity.
-
Reviewing large quantities of relevant papers and textbooks.
Lessons Learned:
-
Reviewed electrical engineering principles.
-
Learned the importance of simplifying mathematical models to reduce simulation time and required computational power.
-
Conducted complex AC circuit analysis using mesh current method.


Iron Man Hand Lamp
-
Fabricated a lamp using sheet metal and sheet metal bending.
-
Utilized a water jet, a bending brake, and a spot welder to manufacture and assemble the lamp.
-
Modeled the bends using Solidworks sheet metal tools.
Challenges:
-
Accurately bending sheet metal by hand.
-
Limits on the weld thickness using a spot welder.
-
Designing for assembly.
Lessons Learned:
-
Adding relief cuts to make sheet metal bending easier and to improve bend quality.
-
Understand your materials’ properties well before designing.
-
Consider how the product will be manufactured and assembled, not just the final product’s function.

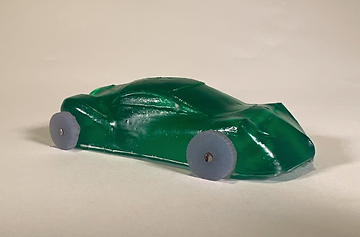
Toy Race Car
-
Used urethane casting to produce a toy race car.
-
3D printed wheels and a chassis to serve as the master in the mold creation process.
-
Fabricated a hard chassis and rubbery wheels from various urethane resins.
Challenges:
-
Minimizing voids and large air pockets in the casting process.
-
Completing casts for parts with small thicknesses and unique geometries.
-
Avoiding undercuts to ensure that the mold is reusable.
Lessons Learned:
-
Tilting the mold during resin curing can improve final part quality.
-
High amounts of part detail can be easily replicated using urethane casting.
-
Simplify part geometry to reduce undercuts and improve mold lifespan.

Puzzle Table
-
Manufactured a flat-pack assembly style table using a CNC router.
-
Designed the puzzle table to use only non-permanent joints such as slot, lap, and housing joints.
-
Utilized VCarve to generate various CNC toolpaths.
Challenges:
-
Machining both sides of a piece of stock, leading to tolerancing issues.
-
Fastening the stock without impeding the cutting tools.
-
Limited sketching capabilities in VCarve.
Lessons Learned:
-
Learned how to program and preview toolpaths on a CNC router using VCarve.
-
Simplify your geometry to avoid requiring excessive material removal.
-
Consider the available cutting tools in your initial design.


Harry Potter Wand
-
Machined a custom Harry Potter wand on a manual lathe.
-
Experimented with several lathe fabrication methods such as turning, knurling, parting, and radius forming tools.
-
Managed lathe rpm based on workpiece material for optimal results.
Challenges:
-
Manually feeding on a lathe produces inconsistencies in surface finish and part quality.
-
Fastening the workpiece during machining to prevent chattering and deflection.
-
Control wheel backlash resulted in difficulty making precisely measured turns.
Lessons Learned:
-
Learned how to set up and machine parts using a lathe.
-
Use additional fixtures to completely fasten the workpiece during machining.
-
Understood how to select appropriate feeds and speeds based on workpiece material.

